Understanding Depth of Field: How to Make Your Subject Pop
- Charles Wallace
- Jun 23, 2025
- 6 min read

Have you ever looked at a photo and instantly felt drawn to the subject, almost like everything else faded into the background? That magical effect isn't luck. It's depth of field (DoF).
Mastering depth of field is one of the most important steps to creating compelling, professional-looking images. No matter if you’re shooting portraits, landscapes, still life, or something in between, understanding how to control depth of field will give your photos that extra edge.
In the simplest terms, depth of field refers to how much of your image is in sharp focus. Learning how to control it helps you separate your subject from the background, guide your viewer's eye, and add depth and dimension to your work. Let’s walk through everything you need to know to make your subject pop using depth of field!
What is Depth of Field?

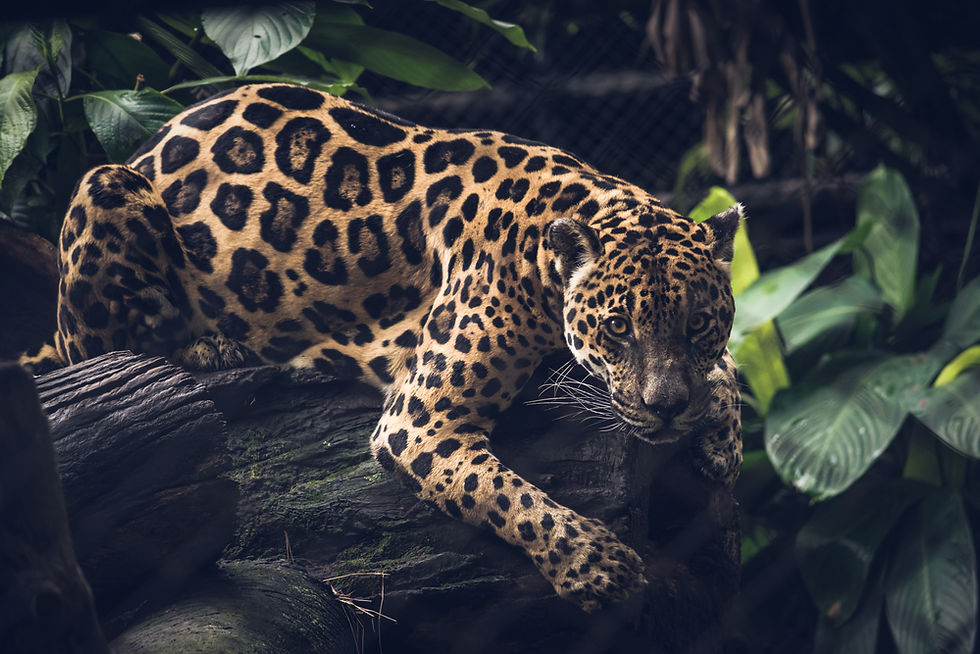
A Portrait Example
Depth of field is the zone of acceptable sharpness in a photo. When this zone is shallow, only a small part of the image is in focus, and the rest appears beautifully blurred. This is perfect for portraits or macro shots where you want the subject to stand out. For example, imagine a portrait with a softly blurred background that makes the subject’s eyes the undeniable focus. That’s shallow depth of field.

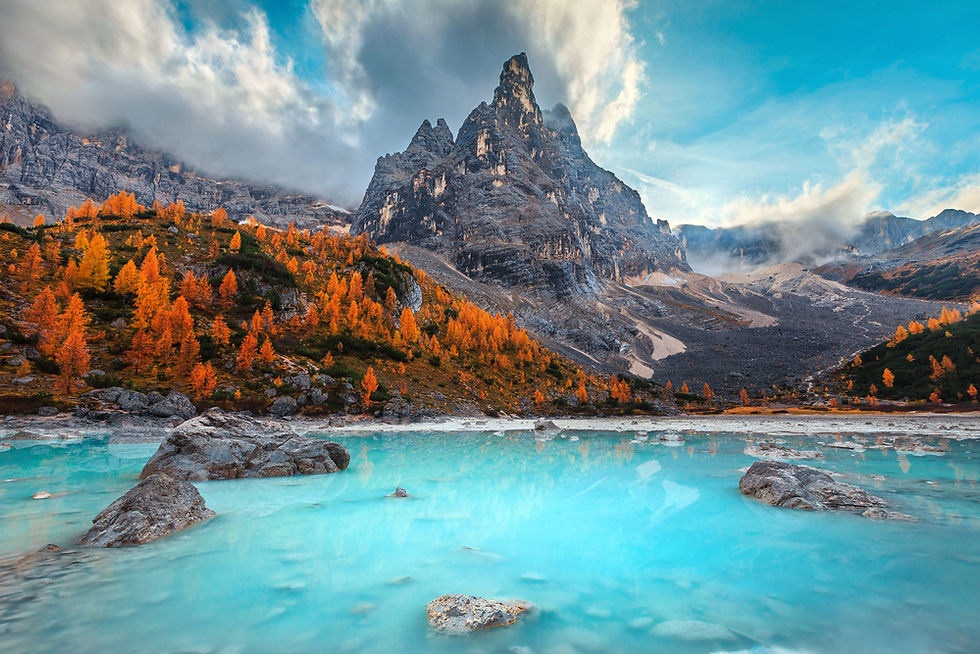
A Landscape Example
Conversely, when the depth of field is deep, more of the image is in focus from front to back. This is ideal for landscapes where you want every detail to be sharp. Picture a sweeping landscape where everything from the foreground rocks to the mountains in the background is crystal clear. That’s deep depth of field.
Depth of field isn't just about sharpness, though. It’s a creative tool. Use it to isolate subjects, create mood, and direct attention where you want it most.
The Three Main Factors That Control Depth of Field

There are three primary elements that influence depth of field: aperture, focal length, and distance to subject. Let’s break each one down.
Aperture
Aperture is the opening inside your camera’s lens. It controls how much light enters your camera. A wide aperture (like f/1.8 or f/2.8) creates a shallow depth of field. This is great for blurring backgrounds in portraits. A narrow aperture (like f/11 or f/16) gives you a deeper depth of field, which is useful for landscapes.
Remember: the lower the f-number, the shallower the depth of field. But apertures like this also let in more light, so you can shoot in low-light situations and still get great results.
Focal Length
Focal length is the zoom level of your lens. A longer focal length, such as 85mm or 200mm, compresses the scene and creates a shallower depth of field. It makes the background blur even more pronounced. Pairing a long lens with a wide aperture can create stunning background separation—a perfect combo for portraits or wildlife shots.
Meanwhile, shorter focal lengths, like 24mm or 35mm, have more depth of field, even at the same aperture setting. So a wide-angle lens will naturally keep more of the scene in focus.
Distance to Subject
The closer you are to your subject, the shallower the depth of field. Move in close, and the background melts away. Move back, and more of the scene will be in focus. This is why macro photography often has extremely shallow depth of field—you’re focusing just inches from your subject.
By adjusting how close you are, along with your aperture and focal length, you gain complete control over how much of your photo is in focus.
Creative Uses of Depth of Field
Depth of field is more than a technical setting. It’s a storytelling tool, too. Different types of photography benefit from different depths of field.

Portraits
For portraits, a shallow depth of field makes your subject stand out against a soft, creamy background. This isolates facial features and reduces distractions. Focus on the eyes, use an aperture like f/2.0 or f/2.8, and position your subject away from the background for the best effect.

Landscapes
Landscapes usually call for deep depth of field to keep everything in sharp focus. Use a smaller aperture like f/8 or f/11. Focus about one-third into the scene to maximize sharpness throughout.

Street and Documentary Photography
Here, a moderate depth of field works best. You want your subject to stand out, but you also want the environment to remain recognizable. Apertures around f/5.6 strike a good balance.

Macro and Still Life
In close-up work, even f/8 can yield very shallow focus. For more clarity, you may need to focus stack—shoot multiple images focused at different points and merge them together.
Common Mistakes Beginners Make with Depth of Field

It’s easy to overdo depth of field or misuse it. Here are a few pitfalls to avoid.
Always Shooting Wide Open
Using f/1.4 all the time can create beautiful bokeh, but it can also make it hard to nail focus. Not everything needs to be blurry. Sometimes a little more depth brings out important details in your images.
Ignoring the Background
Even a blurred background needs to be thoughtfully considered. Bright spots or messy elements can still distract. Move your subject or shift your angle to find a cleaner backdrop.
Letting the Camera Choose Focus
Don’t rely on auto-area focus. Use single-point AF and move your focus point to the subject’s eye or the exact detail you want in focus. Precision matters!
Forgetting Composition
Depth of field affects how we perceive distance and space. Don’t let everything blur into mush. Instead, use depth of field purposefully to draw the viewer into your frame.
Tools and Techniques to Master Depth of Field

Controlling depth of field gets easier with practice, and a few tools can help, too!
Use Aperture Priority Mode
This semi-auto mode (usually marked "A" or "Av" on your camera’s dial) lets you control the aperture while your camera handles the shutter speed. It’s ideal when you're experimenting with depth of field.
Try the DoF Preview Button
Many cameras have a depth of field preview button. It stops down the aperture so you can see how much of the scene will be in focus before you shoot. It’s a great tool for perfecting the depth of field in your shots.
Use Smartphone Portrait Mode
Phones simulate shallow depth of field using software. While it’s not perfect, it’s a great way to practice composing shots with subject separation in mind.
Explore DoF Calculators
Apps like PhotoPills or websites like DOFMaster let you plug in your camera, lens, and settings to see exactly how much will be in focus. Perfect for planning tricky shots.
Practice Exercises to Improve Your Depth of Field Skills

Try these quick exercises to get comfortable with DoF control:
Shoot the same subject at f/2.8, f/5.6, and f/11 to compare background blur.
Photograph a person with busy backgrounds and find angles to reduce distractions.
Create a still life with three objects at varying distances. Shoot wide open, then stopped down, and stopped down again to see the difference in DoF in the image.
Take a landscape and test different focus points to see how it affects overall sharpness.
Remember—practice is the best teacher. Review your images and take notes on what works and what doesn’t, so next time you go out, you have a solid reference point to start.
Print Your Depth of Field Successes

Once you start mastering depth of field, printing your best images is a powerful way to see your progress. A great print helps you spot what worked—from background blur to precise focus—and lets you enjoy your photography in a more tangible way.
We offer affordable, high-quality paper prints that showcase your DoF skills beautifully. Choose from four distinct paper types to suit your image and style:
Glossy Paper: Vibrant and punchy, ideal for color-rich portraits and bold compositions.
Luster Paper: A subtle blend of matte and gloss for a refined look with great contrast.
Metallic Paper: Adds a touch of drama and sheen, great for high-impact depth of field shots.
Fine Art Paper: Museum-grade cotton fiber with a smooth, matte surface—perfect for subtle tones and professional presentations.

Pair your paper print with one of our classic wood frames, which are available in white, black, natural, gold, and silver. You can also add matting (2", 3", or 4") to give your image extra breathing room and a polished, gallery-style feel.
Best of all, we offer pricing that fits a budget and looks like a million bucks. Whether you’re framing a shallow-focus portrait or a tack-sharp landscape, you’ll find an option that highlights your work.
Printing your images isn’t just about putting them on display. It’s part of the learning process. Seeing your photos come to life on paper reinforces what you’ve achieved and pushes you to keep improving. Talk about a great learning tool!


Comments